How to Replace a Touchpad on a Chromebook
Check Warranty Eligibility:
Before you start a Chromebook repair or replacement process, you must confirm the warranty type and coverage for the device! Access below URLs to learn more:
Caution!
- Avoid puncturing, crushing, dropping, mutilating, or penetrating the battery with foreign objects.
- Refrain from using tools to pry or apply pressure to the battery.
- If a battery becomes stuck due to swelling, do not attempt to free it as punching, bending, or crushing a Lithium-ion battery can pose serious risks.
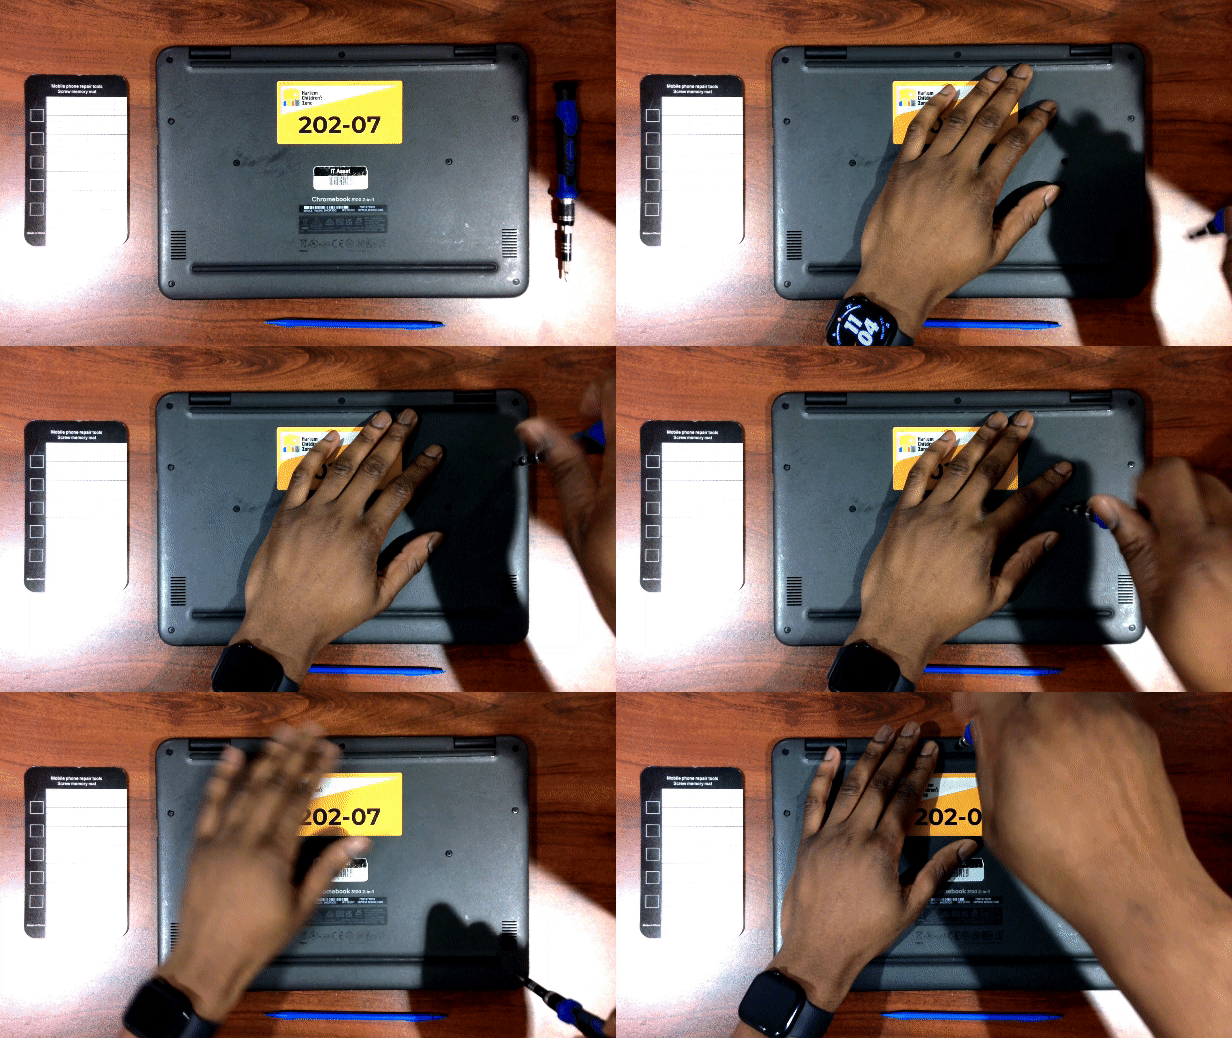
- Using a Philips #1 screwdriver, remove all nine 5mm screws securing the back cover
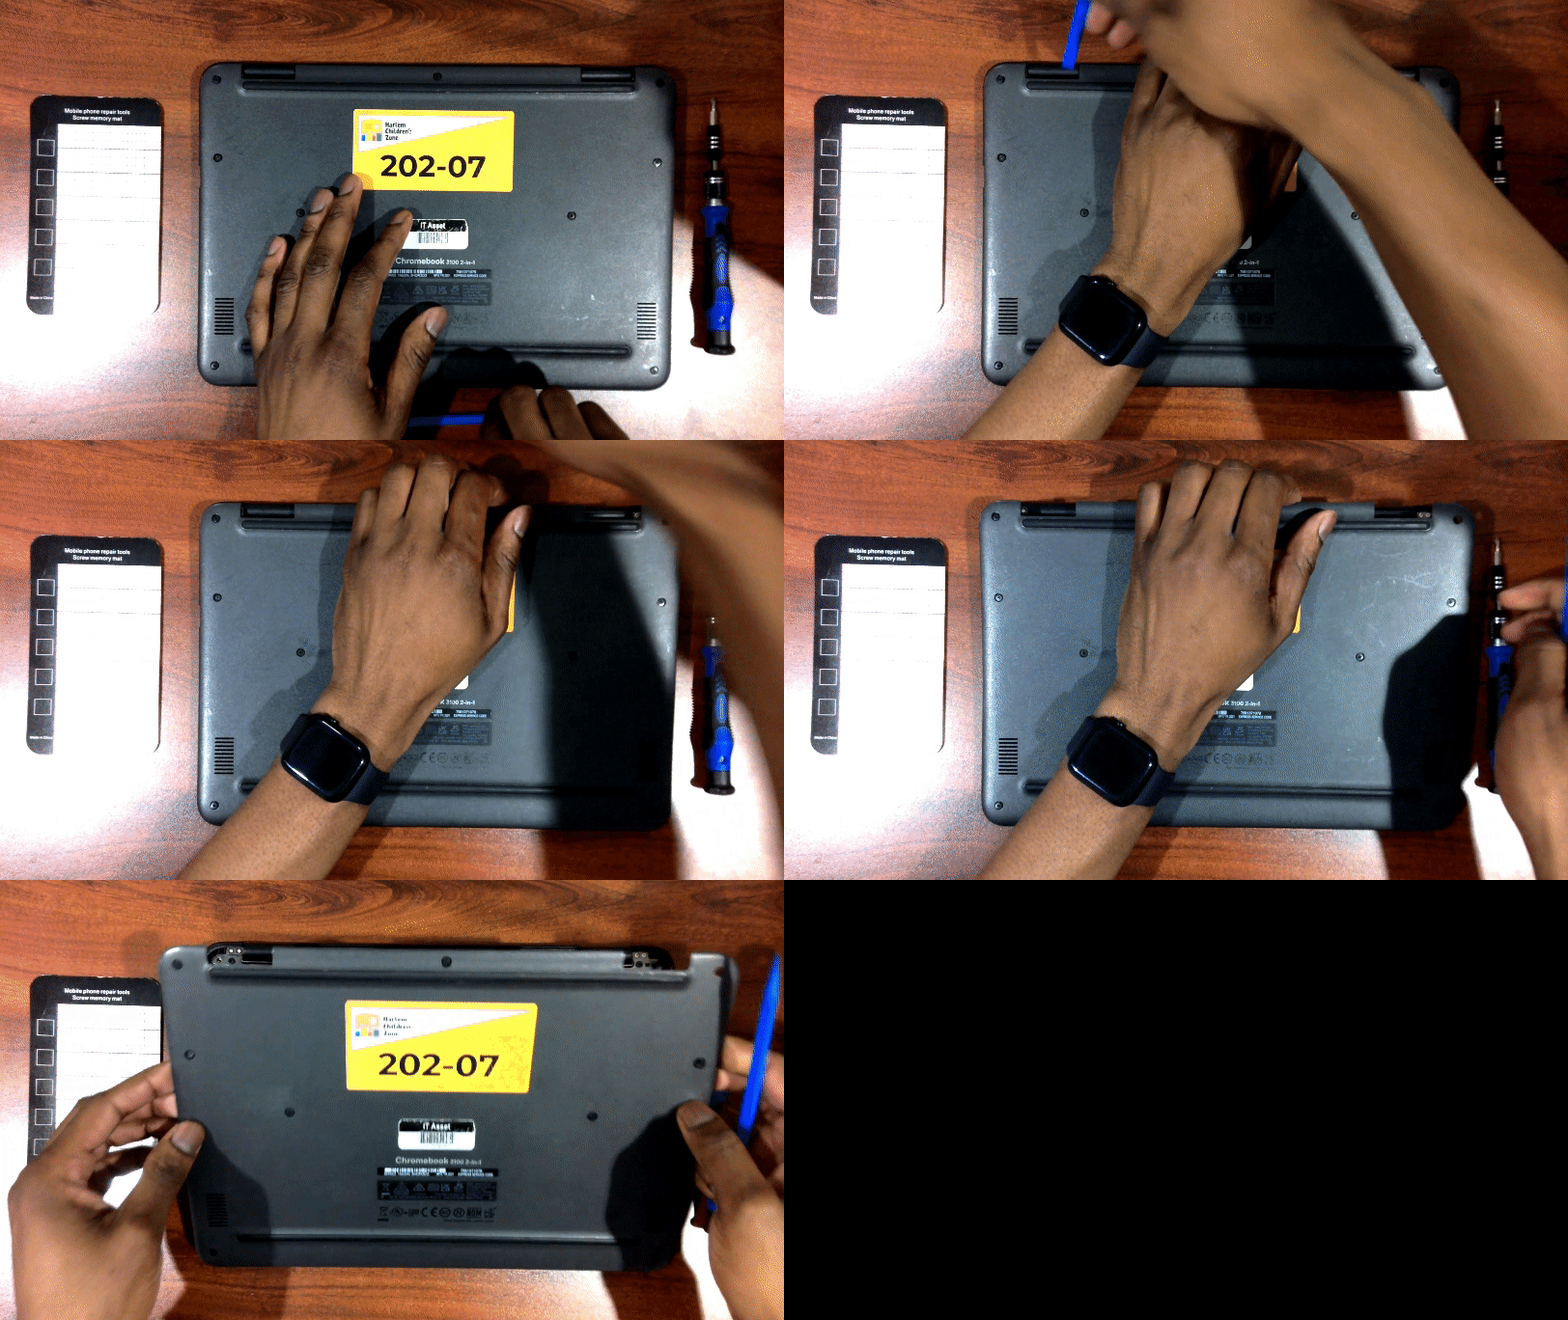
- Gently pry the back cover off the device using an opening tool
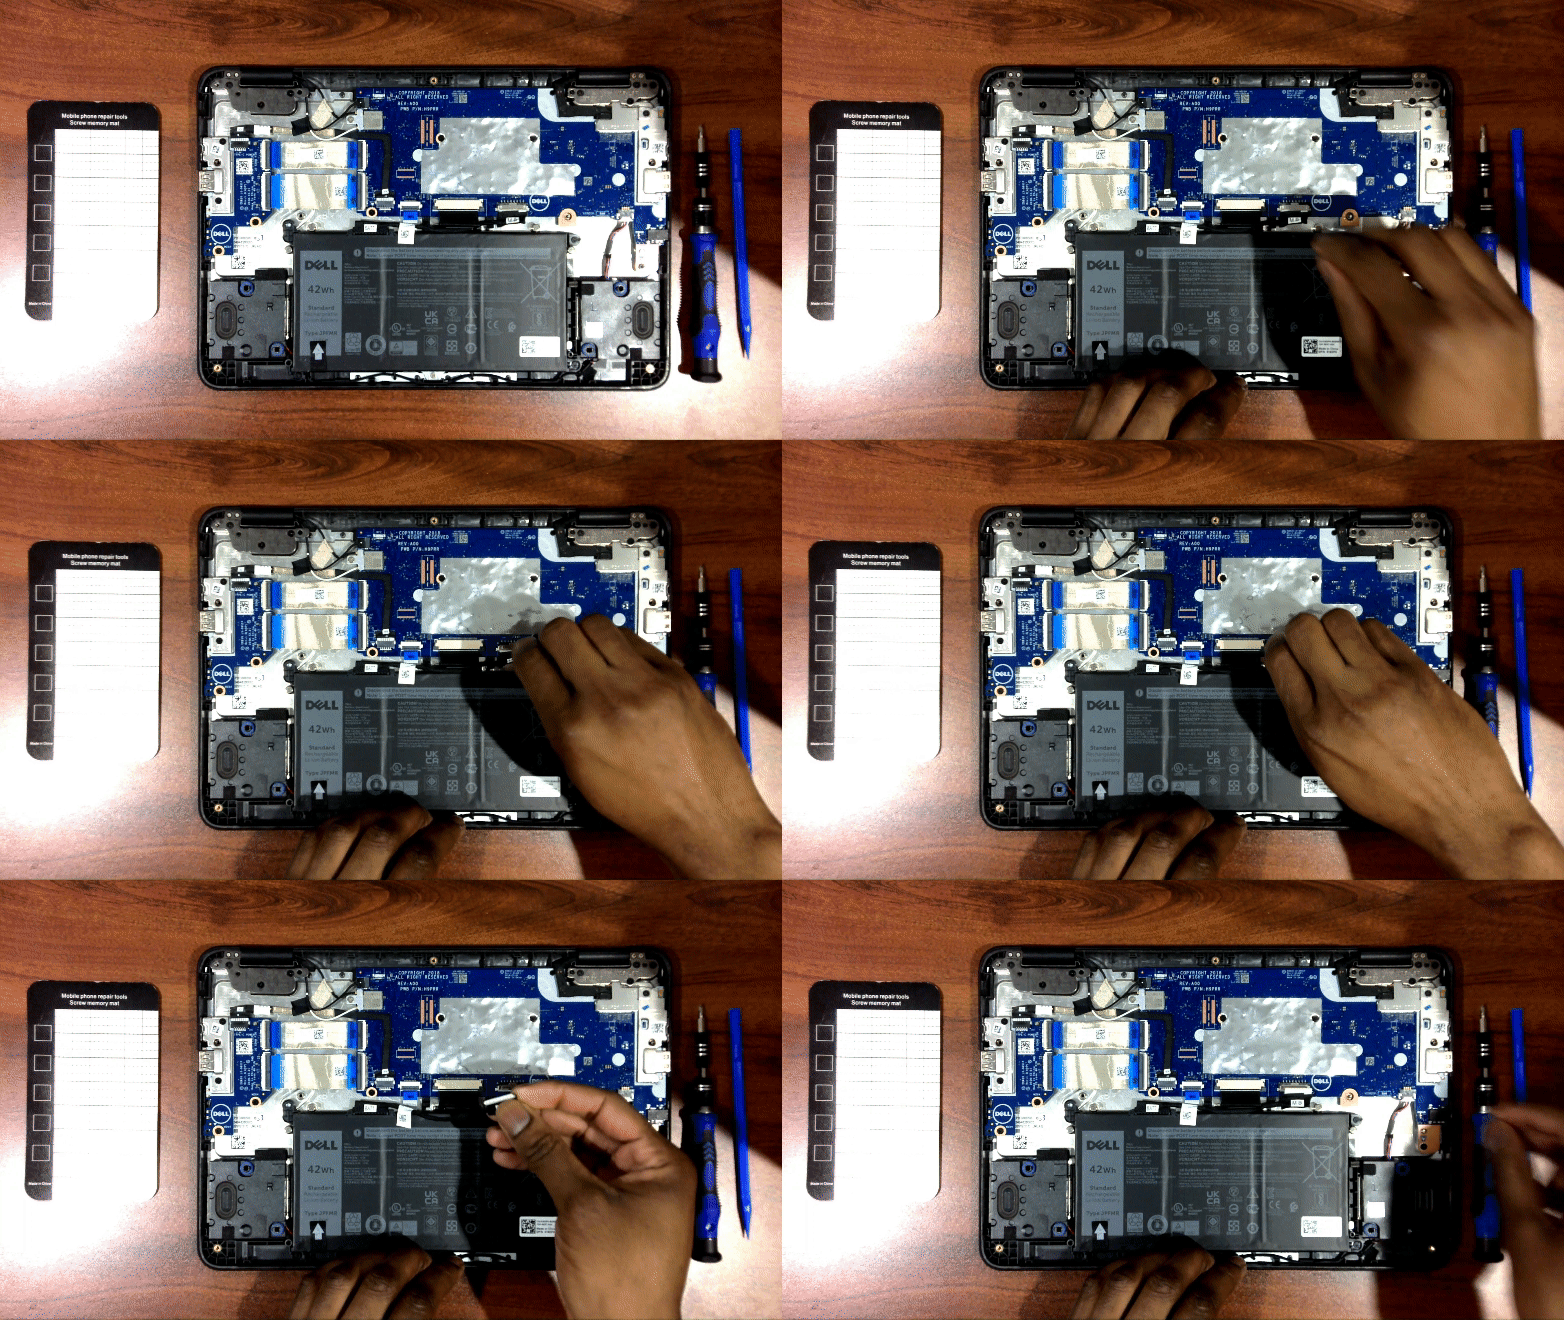
- Disconnect the battery cable from the connector on the system or Main Logic board
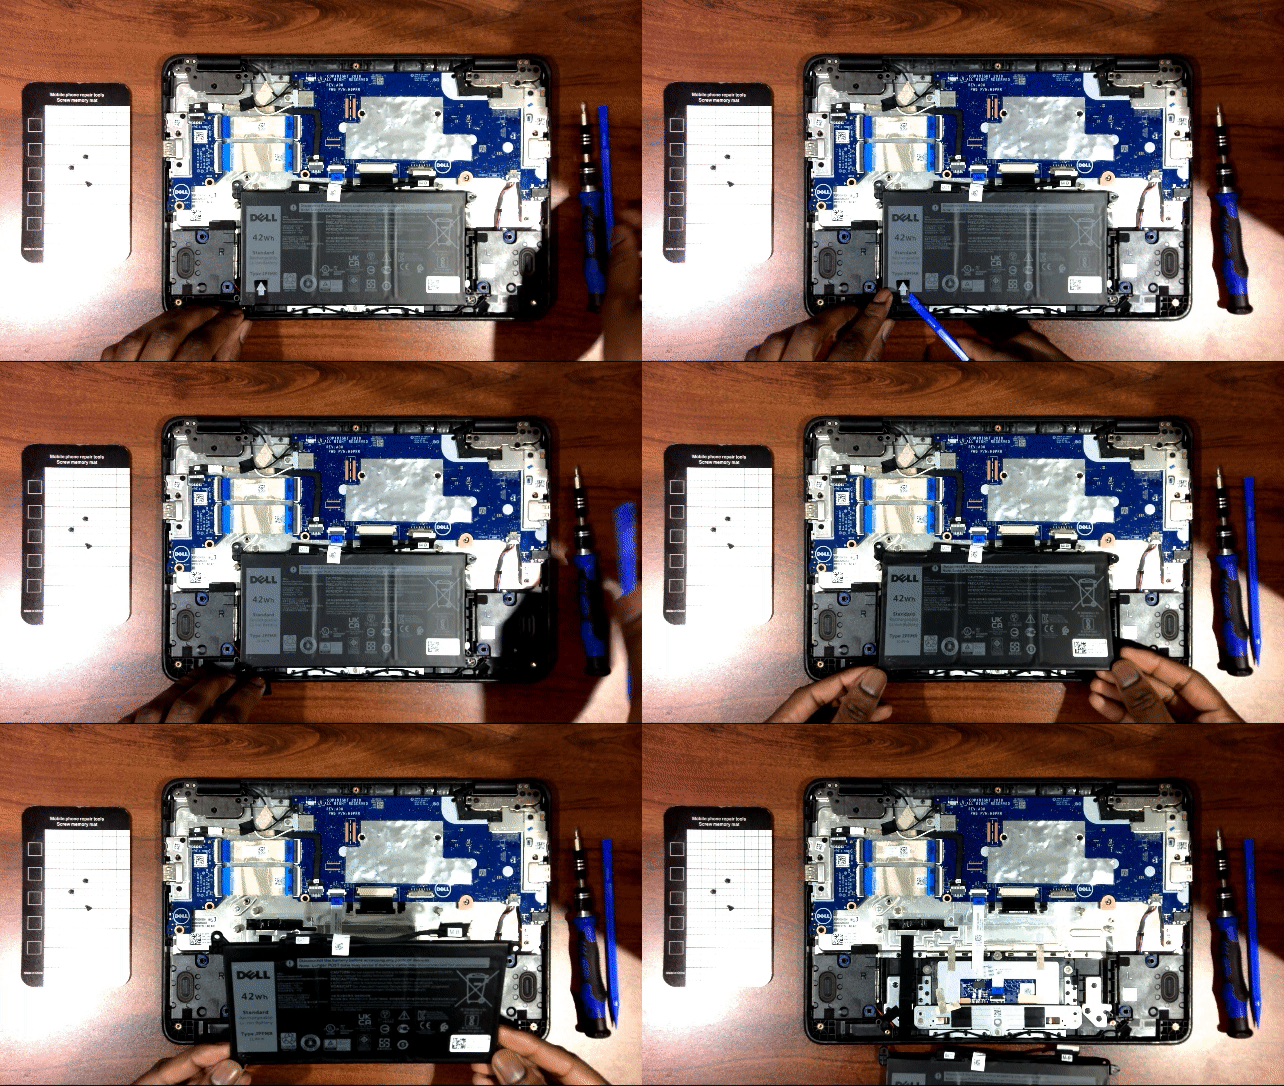
- Using the Philips #1 screwdriver, remove the three 4mm screws that hold the battery in place
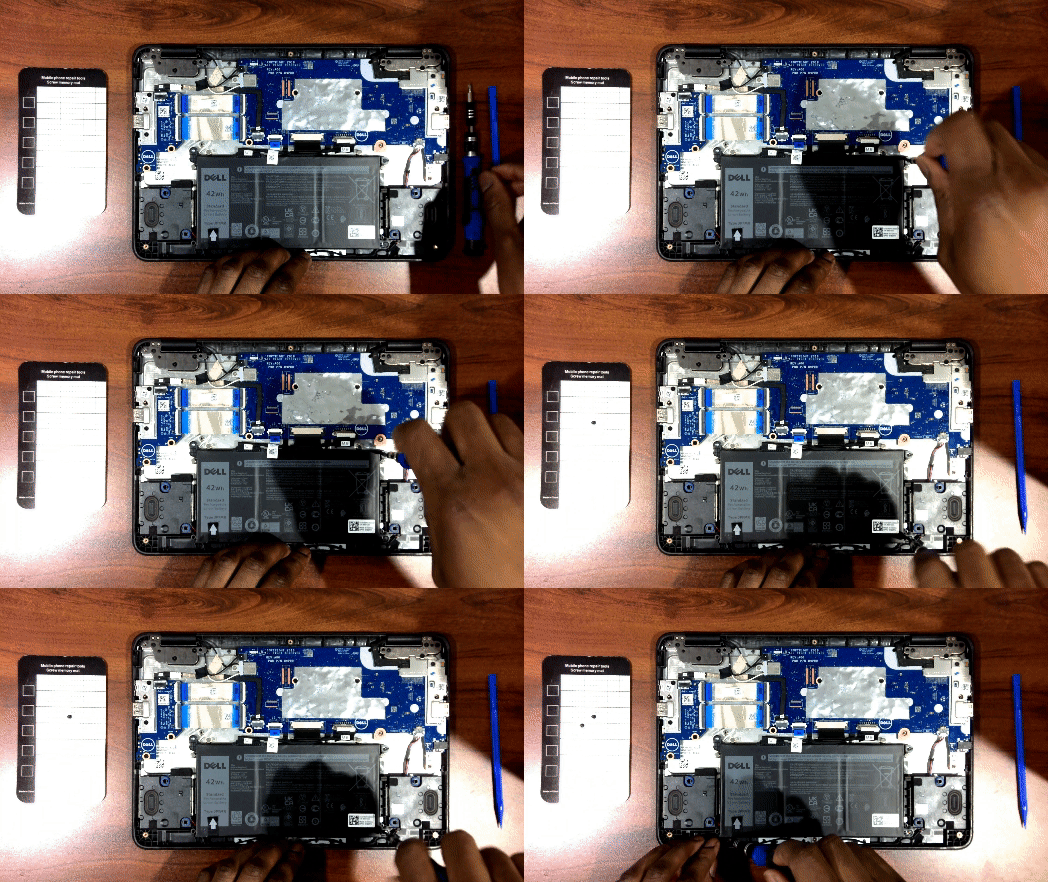
- Carefully remove the battery from the device
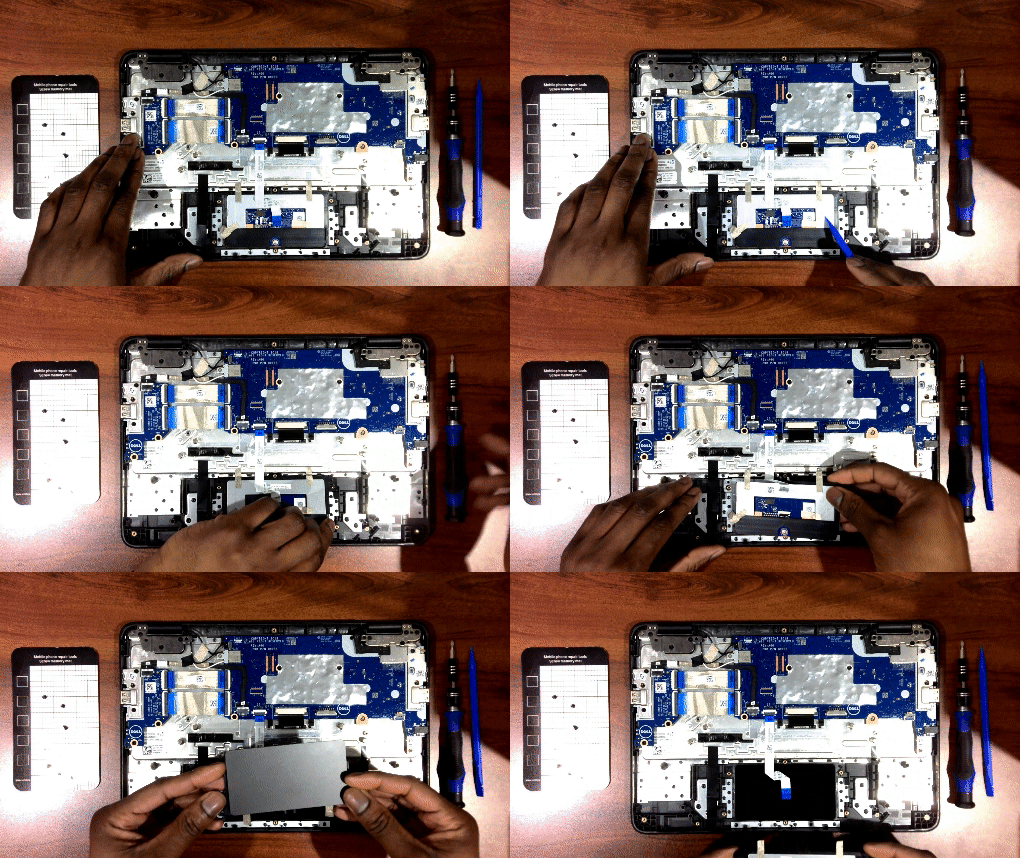
- Using the same Philips #1 screwdriver, remove the 6 Philips head screws securing the touchpad
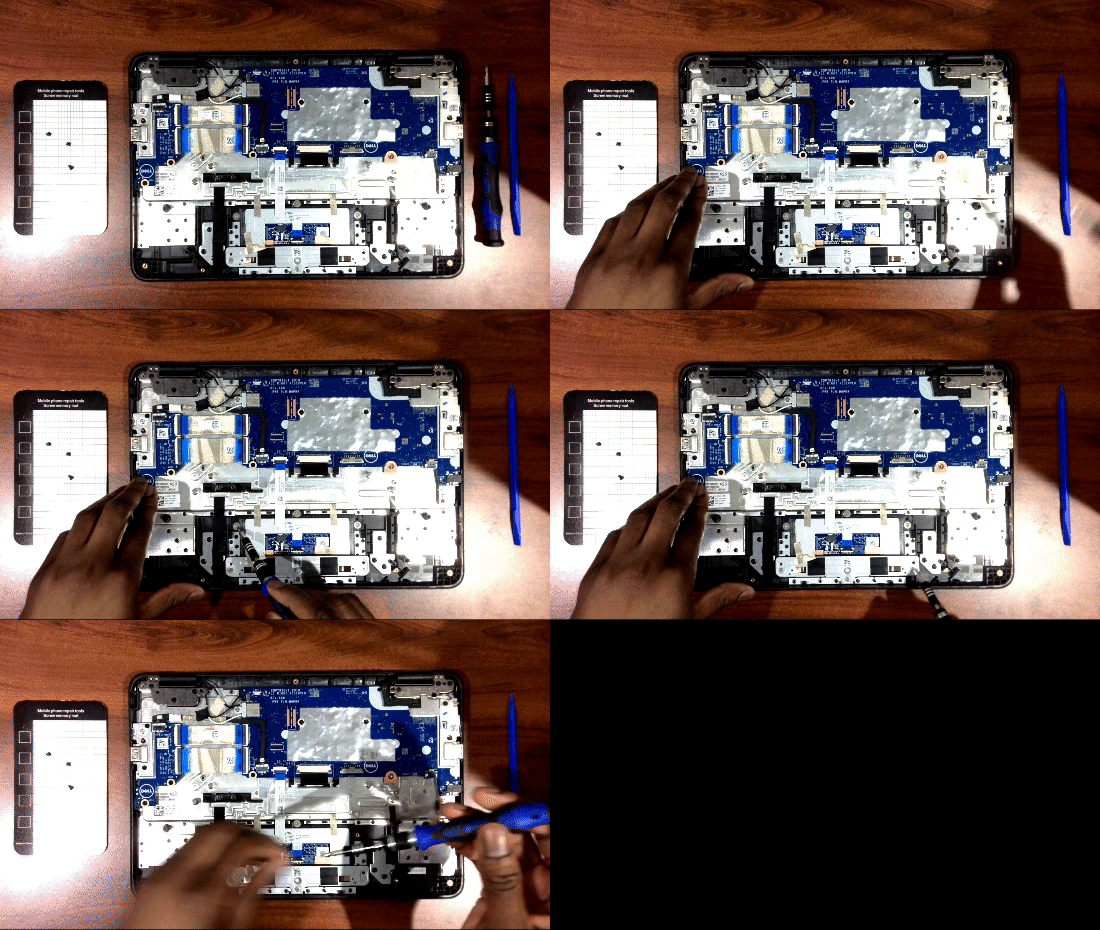
- With the screws removed, lift and remove the metal bracket securing the touchpad
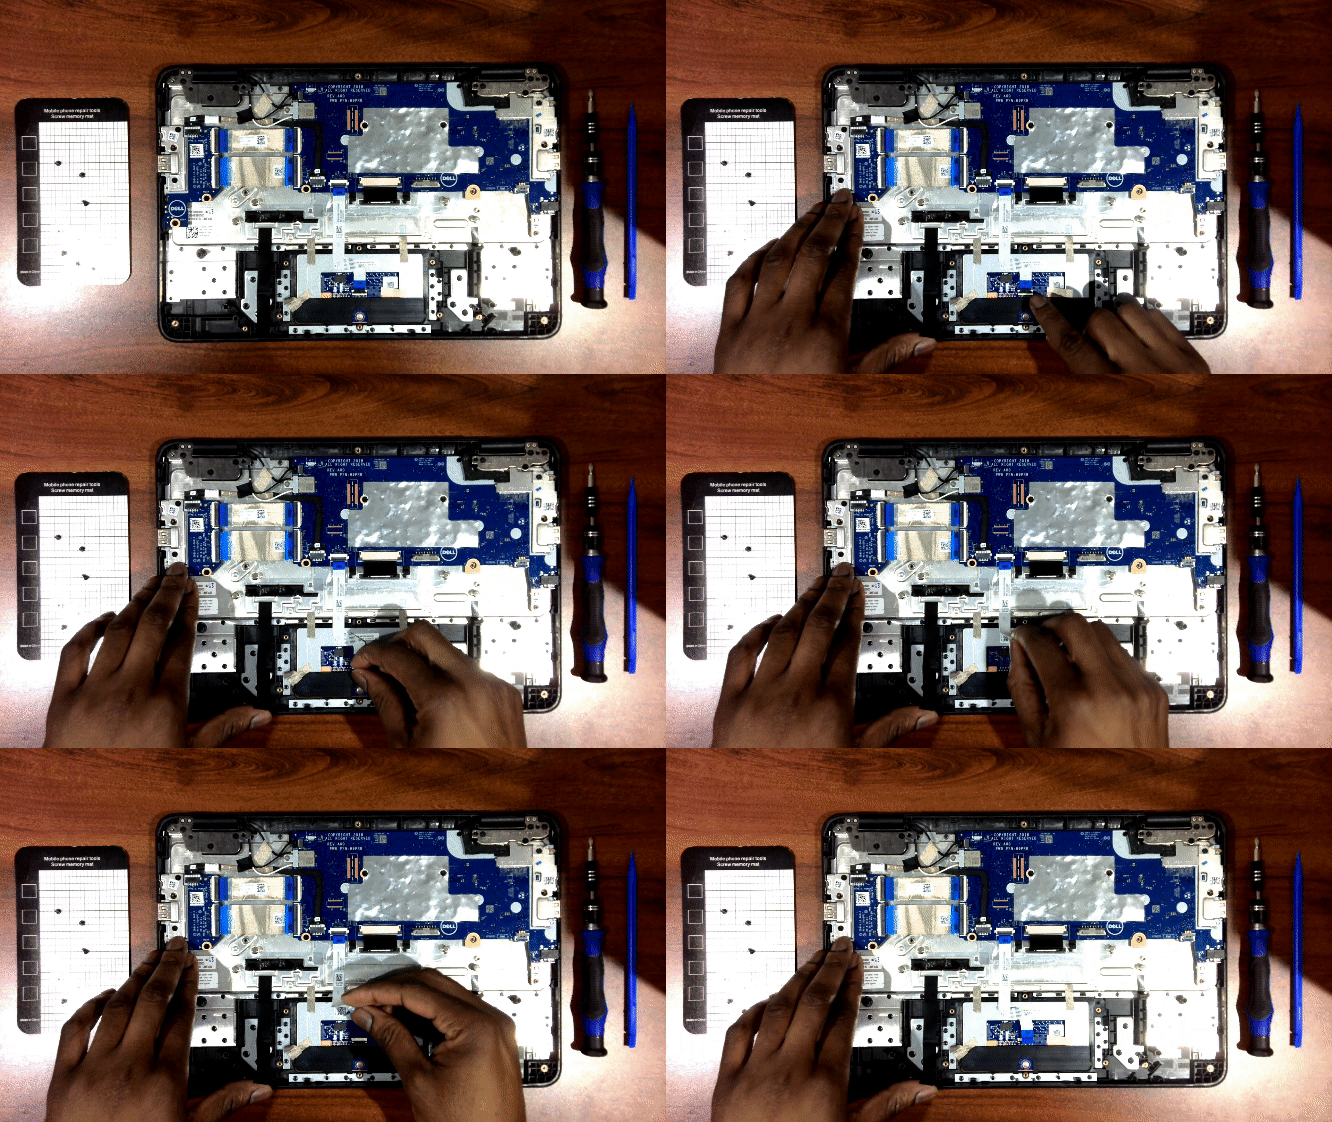
- Next, unplug the ribbon cable connecting to the touchpad
(To do this: gently flip the black tab up and pull out the ribbon using the blue handle)
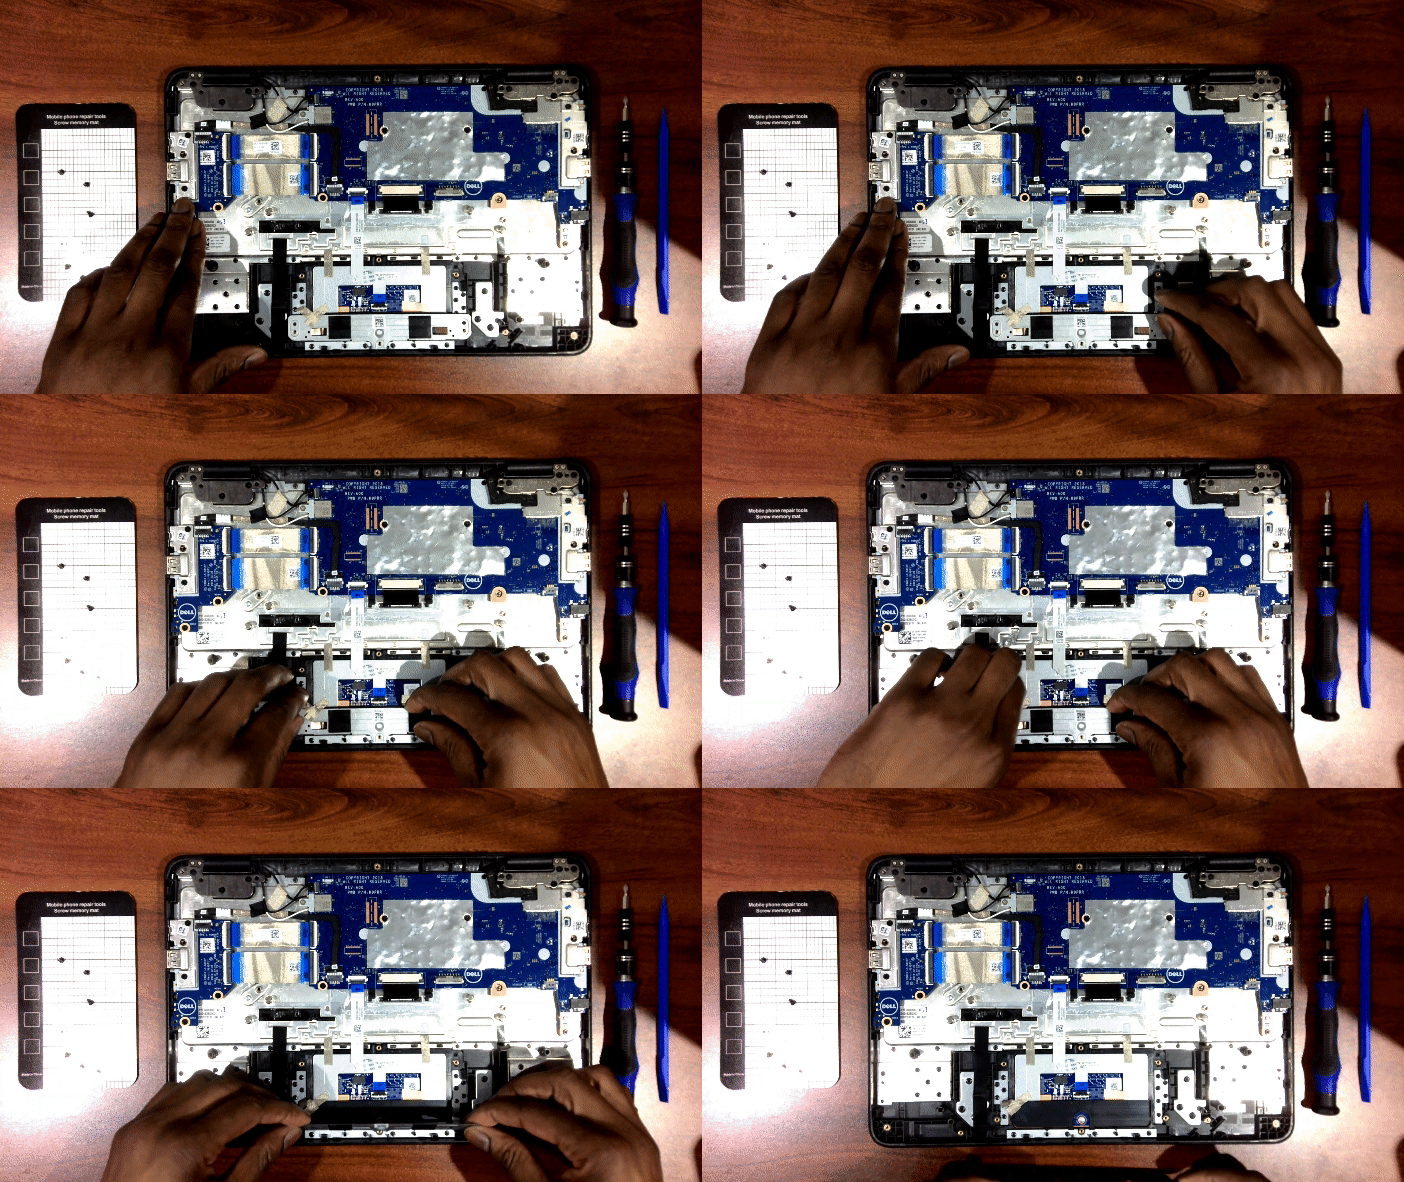
- Finally, grab the touchpad along its edges and lift it off of the Chromebook
Technical Author
Fortune Adams
Lead Support Technician
Member since: Jan 11, 2021 (3 years +)
Harlem Children's Zone